

When I stumble on a good mashup during an Ableton session, I just want to capture that shiz and share it. Mashups force you to split your roles to both DJ and Producer, making Ableton the ideal environment to play. On one side, you can be highly experimental and responsive in Session View; on the other, you’re editing and mixing down the arrangement. Here are some tips to help you get mashing in Ableton.
Mashup: two (or more) unexpected or stylistically-unrelated tracks, when combined, mix to create a unique new song that highlights features of each original track.
That’s my definition. I’m just arguing that if one track is featured more prominently than the other, it gets into “remix” territory. Or, If two tracks are in the same genre, it may as well be a very short “DJ mix”.
Session View: where discoveries are made
100% of the time, I find my next mashup when haphazardly previewing tracks. I already have a large session set up in Ableton for my DJ sets: two channels for House, and two more for Hip Hop. I have one custom audio effect rack on every channel with EQs and filters mapped to my APC40 knobs (these will come in handy later). The tracks are organized by Key (via Camelot wheel / circle of fifths) – here’s the Mixed in Key tutorial, in case you missed it.
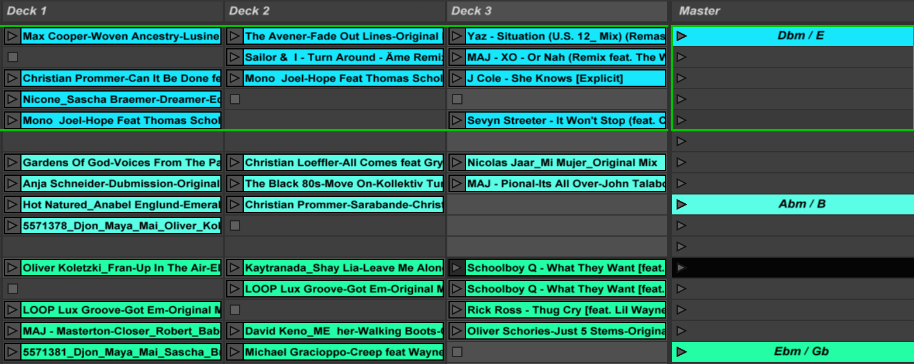
All my tracks have been warped properly, some even split out to intro / main / loop clips. As long as I stay in the same section of the Session grid, nearly every clip triggered is already going to work in both timing & harmony with any adjacent clip.
I add new tracks to this same session on a monthly basis. And when the new tracks are being warped & cut, I’ll use this time to launch existing clips in a complementary key. I’m listening for both timing, and mix potential. Usually I’m testing a DJ transition, but occasionally. I’ll trigger a track I would’ve thought not possible, and freakin magic happens.
Tips for discovering your next mashup
- Get many clips into Session View
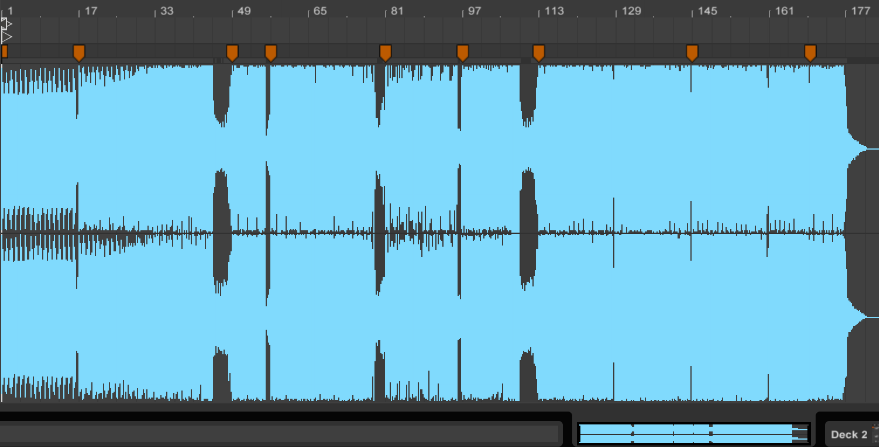
Put your DJ hat on. You’re building an eclectic crate here. You want to assemble a number of candidates, and have plenty of options across genres, ready-to-go. - Warp your tracks
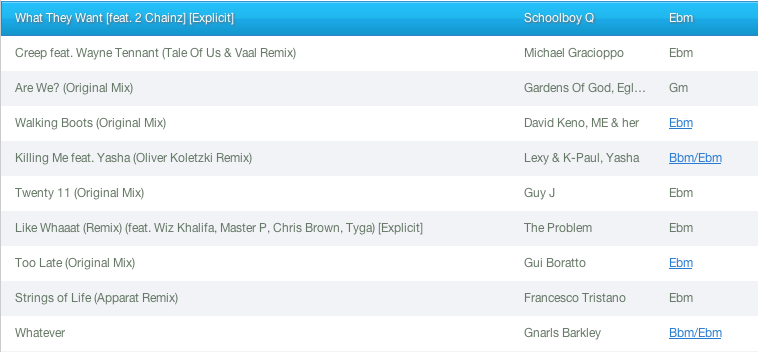
Make sure your 1:1:1s are tight and your warp markers are in place – this work must be done to proceed. - Browse Mixed in Key by hour (key)
Look for unexpected opportunities across genres, but stay in complimentary / harmonic key range – it makes things soo much easier. Be creative, but don’t force what just shouldn’t happen. Establishing a harmonious, sonically balanced mashup should always be top of mind. - Trigger your clips, randomly
Be spontaneous and try tracks from genres that shouldn’t normally work. You’ll be surprised what emerges. If the tracks aren’t playing in tune with each other, you’re off to a terrible start. Fix it now by disabling / eliminating any tracks that are jarring or unworkable. - Listen for something unique
Stop and ask yourself: do these two tracks even sound good together? Could this work, even though it’s unexpected? Would a fan of either genre or artist appreciate this? If you answer ‘yes’ to all three, you’ve found something special – time to proceed.
Make a decision & commit
You’ve found them – the two tracks you want to squish together. Maybe the harmonies work well, maybe the lyrics from one fit perfectly with the arrangement of the other. Maybe you just love both tracks, and think you have a “1+1=3” scenario. Whatever the case, it’s time to commit and finalize the tracks.
- Identify your Backing track
This is the track that carries the majority of the groove, instrumentation and arrangement. It will make up most of your low end, drums and bass line. - Identify your Supporting track
This track is typically “additive”. It introduces a new lead vocal, a separate melody, beat or groove. Sometimes it’s difficult to determine which is the backing track, and which track supports the other. Many mash ups use the formula: “X lyrics on Y.” Jay Z rapping over the Beatles. The Gorillaz on No Doubt. Think about it – which track sits better atop the the other? Usually there’s one best configuration. - Get the highest quality material you can find
Especially for your backing track. If you already warped and cut an MP3 for this track, sorry, but you should really go back and buy a higher quality format, if possible. On Beatport, you can upgrade past MP3 purchases to WAV or AIFF for the cost of the difference. Because we’ll narrow their frequency range, supporting tracks are more forgiving, and it’s okay if they stay in lower quality MP3.
I upgrade my backing tracks to AIFFs only for the purpose of mashups. My MP3s hold up well in most DJ sets, but when I want to do an official release, I want to provide the best quality possible. Hell, it may end up in someone else’s mix – You want to make sure it sounds polished, well mixed and ready for the floor. On a few occasions, I’ve even purchased audio CDs on Amazon just to rip WAVs. Garbage-in, garbage-out, right?
Configure your new Ableton session for the mashup
This is where we jump to Producer mode. We’ve already played around in Session View and identified our backing and supporting tracks. We’re about to switch gears to the Arrangement.
- Start with a clean session
Use an existing DJ session / template if you already have one, we’ll just need to strip it down to the essentials. If you’d prefer to stay in your DJ session, perform a Save-As, and delete any clips you’re sure you won’t be using.
- Set up a few new audio tracks
Use one channel for each of your audio tracks. Add an EQ8 (or 3) to each track, along with any other (transformative) audio effects you might want to use. You can create Sends for delays and reverb, as well. Drop each track volume to -10dB.
Ok, you’re finally ready to start the next phase of the mashup process. In Part 2, I’ll share screenshots and go in-depth with one of my latest projects, the Schoolboy Q vs. Gardens of God cut, and we’ll get into specific mashup tips and techniques.
Continue to Part 2 »
Related Posts
- 10000
 In the first half of this series, I covered the importance of using Ableton's Session View and Mixed In Key to creatively identify your mashup's backing and supporting tracks. I also gave some tips for getting your raw material ready, and setting up a new Ableton session. We're now switching gears from DJ to Producer mode, and I'll be sharing specific Arrangement…
 - 10000
 Take your DJ sets to a new level by learning to mix tracks of the same, or complementary root key. Mixed in Key is an affordable solution that scans your library to detect the key (and energy level) of each track added. Using the Camelot wheel, which is the same as the Circle of Fifths clock face, transitioning…
 - 10000
 If you DJ in Ableton, chances are you'll be spending a significant amount of time warping your tracks. There are some great YouTube videos out there, but I thought I'd share my techniques. Using these steps, my newly added tracks are typically ready for prime time in just under a minute. Make sure your Warp…


Leave a Reply