
If you DJ in Ableton, chances are you’ll be spending a significant amount of time warping your tracks. There are some great YouTube videos out there, but I thought I’d share my techniques. Using these steps, my newly added tracks are typically ready for prime time in just under a minute.
- Make sure your Warp preferences are optimized for DJing
I recommend disabling “Auto-warp long samples” since you’ll override the default warp markers using this method, and it’ll just save you time overall.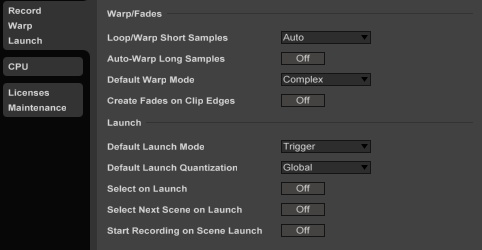
- Import your track into an empty clip in Session View
Let it buffer and build the waveform preview in the Sample Editor - Enable the Warp button from the Sample palette
- Select Complex Pro from the Warp Mode drop-down
This is the best time stretching algorithm Ableton has for commercially mastered tracks – Go ahead, try other modes, but you’ll be back (at least for DJing). 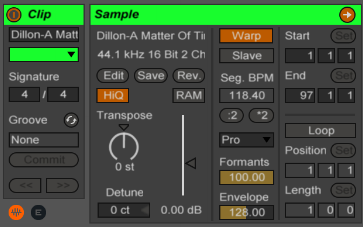
- Find the first downbeat transient
Zoom in on the clip’s Sample Editor and locate the first instance of where the waveform frequency begins to jump off its baseline.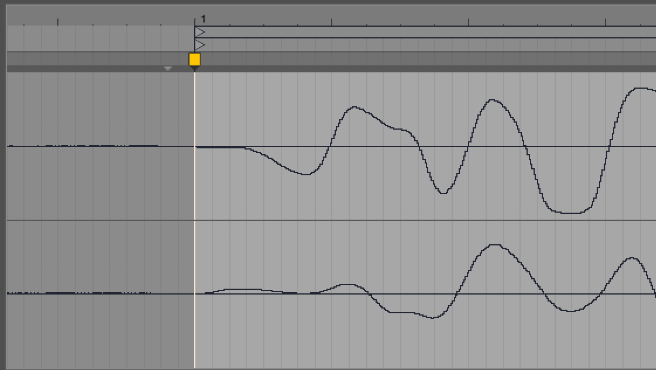
- Click here on the waveform to insert a marker line
Aim for where the waveform is just on the baseline, not above or below. Be sure to watch both channels in stereo tracks, since they aren’t always aligned consistently. - Right-click, choose Set 1.1.1
This makes your marker the new default start point for your track. The Clip’s start arrow will now appear above your marker. - Right-click again, choose Warp from Here (Straight)
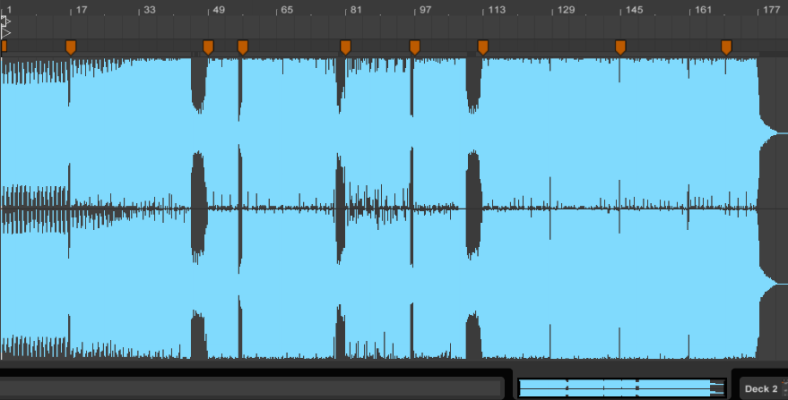
This uses the global tempo to time-stretch your track. It only uses one Warp Marker at 1.1.1 – and that’s okay, we’ll add some more next. - Quickly survey your track for obvious transition points
Because most tracks are produced in 4/4 timing, you should expect standard 8-, 16- and 32-bar scenes. That said, zoom in and look at the “9 bar”, “17 bar” and “33 bar” mark on the clip’s timeline. (Side note: get in the habit of mentally adding 1 bar when viewing the timeline, I personally find it very confusing to see odd numbers here.) You should (visually) see that these locations segue into the next scene: kicks start, breaks begin, choruses enter, etc. Zoomed way out, the waveform itself will have its peaks and valleys. - Manually add Warp Markers
Hover your mouse over the timeline nearest the closest downbeat transient at these transition points. Ableton will automatically give you a recommended Warp Marker to add beneath your cursor. Double-click the timeline to add a new Warp Marker, and drag it right or left to the closest major bar. Remember to think in terms of 4-, 8-, and 16-bar increments.Tip: always add a Warp Marker to the first transient after a break, as it’s one of the best times to reset your timing, and make sure everything is on the metronome.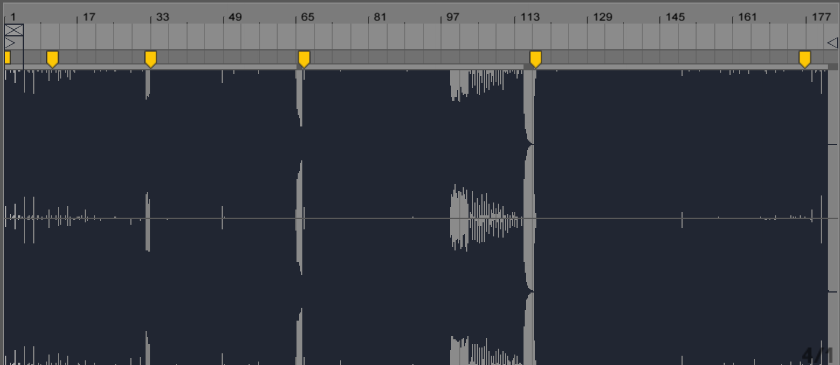
- Don’t forget an outro marker
If you don’t set a final marker in the last few 16-/32-bars of your track, it can get off time when you’re transitioning. Even simple outro hi hats or percussion with no downbeat can create a nasty galloping effect. - Test your warping with the Metronome
Play your track all the way through to ensure your timing is tight. - Use the Save button on the clip’s Sample palette
This creates a small ASD file that references all the warping information, so you’ll never have to do this again.
So, this is how I’ve been doing it for years. Have any additional tips to share? Let me know below .


Leave a Reply