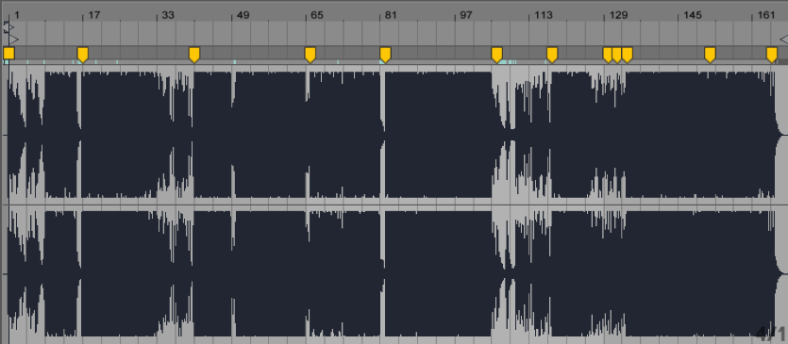
In a previous post, I outline how I warp tracks for my Ableton DJ sets. Here I’d like to share a few additional discoveries and learnings I’ve encountered along the way.
Your Ear vs. Ableton’s
Because Ableton has built-in transient detection, it may recommend Warp Marker locations that aren’t necessarily where you want or expect them to be. In my experience, I would say that whatever method you pick, just be consistent and warp all your tracks the same way.
- Option 1: Use Ableton’s recommended transient markers, even if they are slightly off where you’d expect them to be . Chances are that its guess is good enough, as long as it uses that same approach with ALL your tracks. In my experience, it does not.
- Option 2: Set your own Warp Markers, and be very precise about it, zooming way in – This may take longer overall, but will likely yield better mixes in the long run since you were more granular in your approach, and every track is a bit different.
Limited Right-Click Menu
Sometimes Ableton displays a different, limited set of right-click menu options on the Sample Editor, void of the critical “Set 1.1.1” feature. This happens most frequently if you try to right-click before the clip’s previously set Start Point.
- Solution 1: Toggle the Show/Hide Envelope button on the Clip palette (little circle with an “E” in it) a couple of times – This usually fixes it, and gives you the default right-click menu again.
- Solution 2: Drag your clip’s Start arrow back in time to somewhere before where you intend to set your 1.1.1, then try your right-click menu. If it stops you from dragging the arrow back any further, use the Start field numbers in the Sample palette – simply click and drag down and it’ll rewind your start point (into negative values).
Warping the Snare vs. the Downbeat
One thing that’s dawned on me over the years is that the snare is often much more consistent in its timing than the kick drum. On certain (highly compressed) tracks, the downbeat can be very very thick, and near-impossible to find an accurate transient. However, if you step back one bar, the peak of the snare is probably crystal clear and easy to snap to the timeline. For every three warp markers I set for kick downbeats, I typically use one on the snare. This is a great technique for fine tuning the overall warp. Remember that tracks have their own grooves, so it’s not uncommon for beats to shuffle on- and off-time.
Demo Multiple Warped Tracks at Once
Your warping is only as good as how well they play together in the mix. Once your tracks are warped, be sure to preview them with other previously warped tracks. You don’t want to discover things are off by a whole bar when you’re out playing live (although an on-the-fly marker adjustment typically goes unnoticed).
Extra Bars
Sometimes a track has an extra bar or two, to add tension, mood, stutter or an unexpected break. Usually, I just try to make myself aware of it, since I like to familiarize myself with my tracks.
I’ve tried to remove these gaps by squishing together book-ended Warp Markers, but it usually creates weird glitchy artifacts and squeals in the audio. Not recommended. For significant edits like that, you’d probably want to use Follow Actions instead. Here, I just try to remember to mix in my next track after this point, otherwise everything gets off sonically by a half measure.
Using Warp Markers as Indicators
Because there are no true cue points in Ableton, I’ll add a series of (unadjusted) Warp Markers to the clip, so that I can be made aware something’s about to happen. Because I know the track, it’s just a visual reminder. It can be really helpful for dealing with those unexpected extra bars. I also use this technique to mark areas where my next track should begin if I have a set planned.
So, what other discoveries have you made while warping your tracks?
Let me know in the comments.


Leave a Reply